WWW.STARQUESTGARAGE.COM
THE ONLINE STARION & CONQUEST TECHNICAL REFERENCE
1G STEERING WHEEL AND SHIFT KNOB SWAP
PROBLEM:
OEM StarQuest steering wheel is cracked and damaged beyond repair and OEM shift knob has become tacky/sticky due to sun exposure.
OBJECTIVE:
Replace both the OEM steering wheel and shift knob with inexpensive and commonly available 1G counterparts.
PROS:
(a) 1G steering wheels and shift knobs are widely available in any junkyard or on eBay
(b) 1G parts are cheap
(c) Direct bolt-on replacements
(d) 1G steering wheel feels more sporty as its design is closer to a Momo-style racing wheel
CONS:
(a) No radio controls on wheel
(b) May look "out of place" to some people
PARTS LIST:
1G Steering Wheel (with original 17mm mounting flange nut if possible)
1G Shift Knob
TOOLS LIST:
Philips Head Screwdriver (medium tip)
17mm Deep Socket
Long Rachet or Breaker Bar to fit 17mm Deep Socket
Standard Pair Pliers (optional)
Torque Wrench (optional)
FINDING A 1G STEERING WHEEL:
eBay would be a good source for those who dont have access to junk yards. However, there are MANY 1G cars in local junk yards so you should have plenty to choose from. Pick one with minimal wear, cracking and sun fading. To remove the 1G wheel, you will need to unscrew the small philips screw that holds the horn pad in place. The screw is located under the steering wheel and directly behind the center spoke of the wheel. Once you uncrewed the screw, remove the horn pad by sliding it upward slowly...just enough to get it loose enough to unplug the horn wire connector. You will now see the 17mm mounting nut (some nuts have flanges, some don't). It's best to lock the steering wheel now if it is not already as this will make it easier to break the 17mm nut loose. Break the nut loose and back it off approximately 3/4 of the way but no more. With the nut partially backed off, grip the wheel with the common 10 and 2 hand position and rock the wheel side to side while pulling toward you in order to loosen the wheel from the steering shaft. If you fail to leave the nut on the shaft and rock the wheel off as described, there is a good chance you will end up hitting yourself in the face when the wheel breaks loose...SO MAKE SURE THE NUT IS BACKED OFF THE SHAFT 3/4 OF THE WAY AT MOST! Once the wheel breaks loose, remove the nut and wheel and replace the horn pad making sure to put the little philips screw back in place as well. Also, if the 17mm nut was a flange nut, you might want to take that with you as well. Now you can grab a 1G shift knob while you are at it too. There are a few different styles but they all have the same mounting method. Shift knobs fit conveniently in your pocket and as they say, when at a parts yard, if it fits in your pocket, its free! REPLACING THE OEM STARQUEST STEERING WHEEL: The proceedure for this will be basically the same but there are a couple of minor differences. First, because you are removing the wheel that is on YOUR car and you dont want to ruin the alignment, you need to make certain that the wheel is TOTALLY straight before and during the removal proceedure.
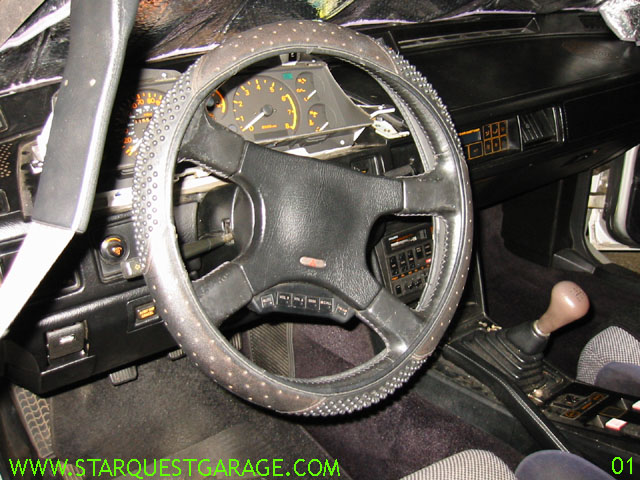
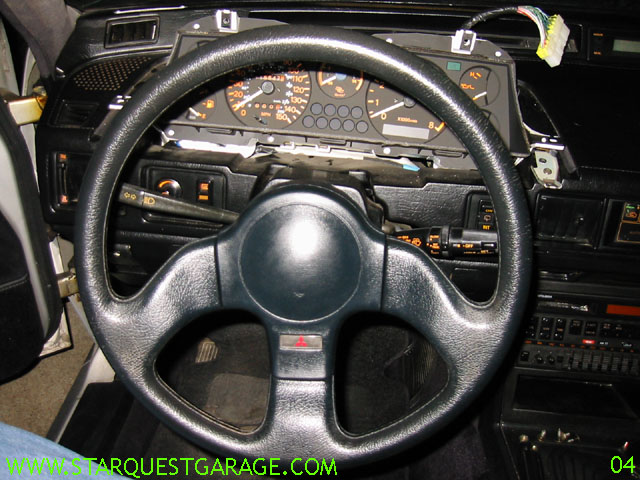
HERE IS THE STARTING POINT:
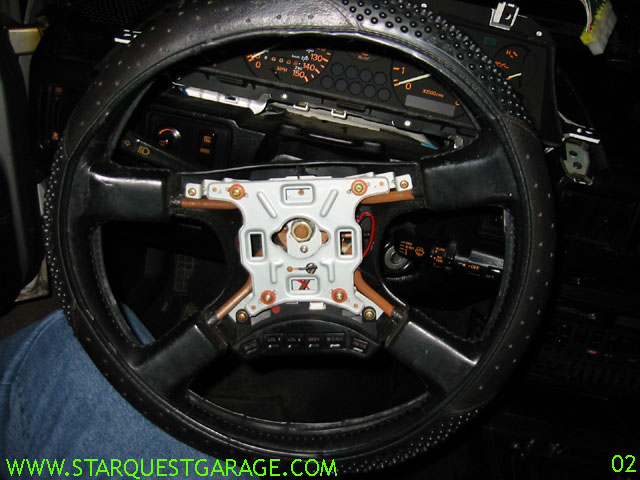
Second, unlike the 1G wheel, the horn pad on the OEM StarQuest wheel (on widebody cars)does NOT have a screw to remove. Simply pry the horn pad off one corner at a time...slowly and gently. The StarQuest horn pad is held in place by 4 spring clips which will release when pulled. Third, when you remove the StarQuest horn pad, you will see the 17mm mounting nut. Unlike the 1G wheel, the StarQuests (should) have a split or lock washer. Remove your steering wheel as described above while keeping the wheel/steering rack straight and save the lock washer.
HORN PAD OFF AND WHEEL READY TO REMOVE:
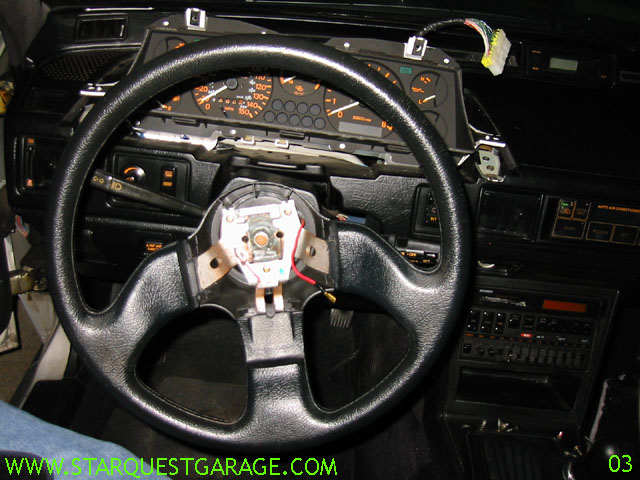
Since both the StarQuests and 1Gs have a 36 spline steering shafts, you should have no problem lining up the 1G wheel straight. One spline off is a 10 degree error and that will be obvious. Slide the 1G wheel onto the shaft, rock it side to side while pushing away from you and then make sure to put the lock washer and 17mm flange nut back on and torque it down (FACTORY SPEC FOR WIDEBODY IS 25-33 ft/lbs). Again, make sure the wheel is straight before you connect the horn wire and install the horn pad. Don't forget the 1G horn pad has 1 small philips retaining screw that needs to be reinstalled.
1G WHEEL IN PLACE AND READY FOR HORN PAD:
With everything torqued-down and installed properly, grip the wheel and make sure everything feels tight. Also, honk the horn to make sure it works (you need to have your key in the ACCESSORY position for the horn to work).
HORN PAD OFF AND WHEEL READY TO REMOVE:
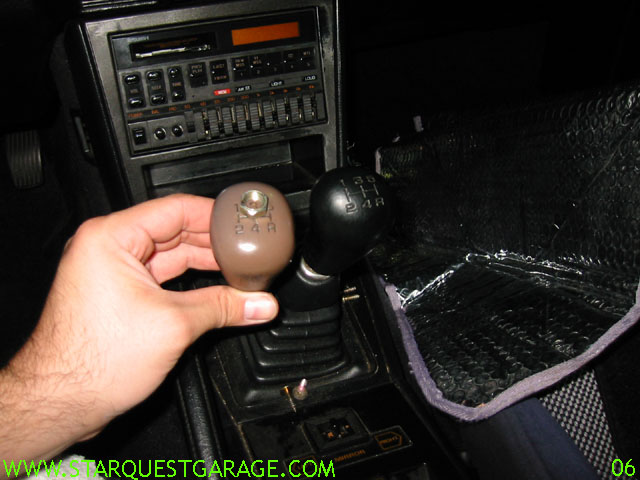
REPLACING THE OEM STARQUEST SHIFT KNOB: If you don't NEED to replace the OEM shift knob you might ask why bother? Well, shift knobs are more of a personal preference item but the fact is that the OEM knob weighs A LOT. You may not think there is much of a difference between the 1G and the StarQuest knobs but it really is HUGE. Additionally, there were 2 different shift knobs available in the 1G; one similar in size and shape to the OEM starquest knob and one "pistol grip" style knob.
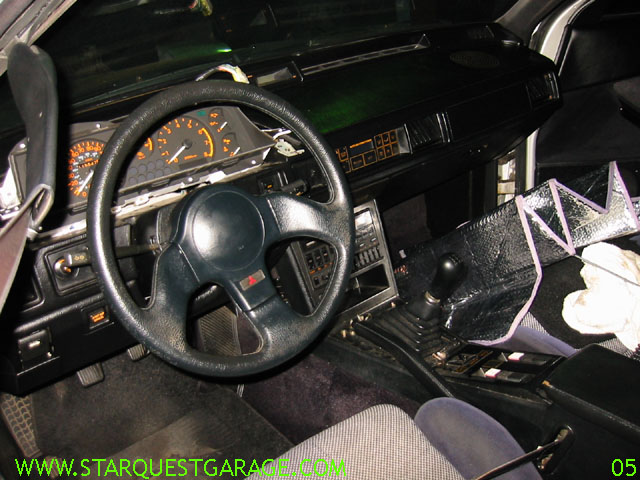
1G WHEEL AND SHIFT KNOW INSTALLED:
Simply unscrew the OEM unit to remove it. With the OEM knob removed, you will find a nut at the base of the shifter threads. This is where the optional pliers might be needed but most likely you can just remove it with your bare hands. Finally, just screw the 1G knob down onto the shifter...all the way down. That's all.
THE OEM STARQUEST SHIFTER AND STOP NUT NEXT TO THE 1G KNOB: